Subway Wall Tiles in Mixer 2020

I’m working on an abandoned subway terminal scene called "Undergrowth Station" and I needed a great wall material for a backdrop. Here’s how I made one in Mixer 2020.
I have to say that I relied heavily on Josh Power’s tutorial “Create Grungy Tiles in Mixer 5” to create this material. Its a fantastic 5 minute tutorial that got me super comfortable working with layers and masks.
It’s taken me a few attempts to get comfortable working in Quixel Mixer 2020. All of my previous materials were outdoor/nature based and I couldn’t get anything near looking realistic.
For the “Undergrowth” project, I am building an abandoned subway station and I needed a wall tile to put up on the back wall. Fealing with classic geometry like squares and lines was a lot easier than organic shapes.
I first tried applying a base white swimming pool tile texture to a wall bsp and quickly realized how boring it was. The tiling was predictable, it was flat, and far too clean.
Going through Josh’s tutorial I realized how important it was to sweat the small stuff. The details. Masking away a tile here and there and painting plaster splotches where they used to be. Or Rasing/lowering or tilting individual tiles to break up the predictability.
Creating imperfections makes things come alive. Because our world is imperfect.
Layers
- Base layer is Damaged Concrete
- Next is a tactile sidewalk texture repeated 4x4. This gives the appearance of a grout pattern. Props to Josh on this one.
- On top of that is wall plaster painted with a splotchy brush where tiles would be removed.
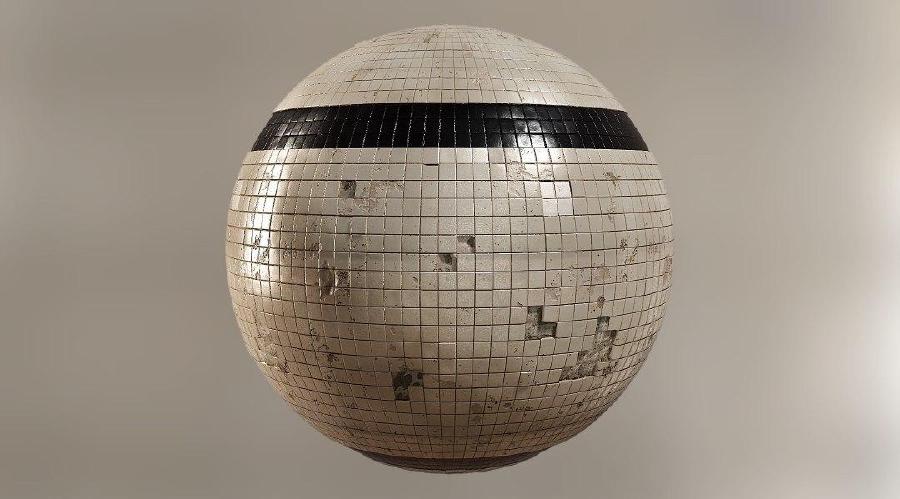
- Then we’ve got the main attraction raised up a bit and sitting on the plaster. Old Swimming Pool Tiles. 4.1. A few of the tiles are masked out.
- The same swimming pool tile texture duplicated, with the albedo changed to a black and then masked to look like a strip of black paint.
- Painted Cracked Concrete Wall is used with the Damaged Concrete again to give some surface blemishes.
- I struggled the most with the “dirt” layer. I wanted to create something similar to the reference photos, where it looks like exhaust or soot powder is bound to the tiles. I ended up going with a solid black layer with a perlin noise mask. This could be improved.
- Finally I made two displacement layers (one for up, the other for down) to push some tiles in and out randomly. On the tiles I pushed in, I masked out the dirt layer.
Next Steps
-
Figure out how to make a really pretty material render. I see a people using Marmoset Toolbag 3, but I don’t quite want to pay for a license yet. Blender maybe?
-
Improve the dirt layer
-
Include the material in the Undergrowth project.